Converting an unfinished room into a home theater can be an extremely rewarding project. Your dark and dreary basement, for example, can become a cozy entertainment spot the whole family can enjoy. Plus, it’ll add value to your home.
Transforming an area into a comfortable, enjoyable home theater takes vision, a solid design plan, a budget and at least a few months—yes, months—of labor to complete. The design, construction and installation time can seem like an eternity, but as the pros at The Home Theater Store in Kennesaw, GA, prove in the following project, each step of the process is critical to achieving a result you can be proud of.
So how long exactly does it take to turn an ordinary basement into an extraordinary home theater? Once you’ve hired a home theater design firm, set your budget and sketched out your ideas, three or four months is typical, says company owner Jamie Wedel. Most projects, including the one featured here, are broken down into several phases.
Phase 1: Design
The most important step of a home theater is a good design. You’ll need to decide whether you’d like the room to function as a dedicated theater or a multipurpose entertainment room, how large the space should be and what type of content (for example, just movies or also sporting events, kids’ shows and the news) you plan to watch. In this case, the homeowners wanted a casual entertainment hangout that would cater to a variety of activities, including movie watching, karaoke performances, and sipping martinis and cappuccinos with friends.
Based on those parameters, the designers at The Home Theater Store drew up blueprints for a 28-by-20-foot area. The blueprints detailed the layout of the electrical, lighting, and heating and cooling components, as well as the locations of the furniture and audio/video equipment.
Time spent: 3 days
Phase 2: Framing
Concrete is an acoustical nightmare, so sheetrock and acoustical insulation would eventually need to be installed. Rob Wedel, construction specialist and theater designer at The Home Theater Store, and his brother-in-law, Alan Brock, started by firring out the walls and framing in the space, isolating the studs from the floor joists to prevent the theater’s sound from escaping into the main living areas of the home. He built a room that would measure 28 by 20 feet and would feature a tray ceiling and an entertainment niche to house a 100-inch projection screen. At the same time, Rob knocked down a wall on the stairway to create a more open feel.
Time spent: 2 to 3 weeks
Phase 3: Roughing In
New lights and a wet bar were planned for the space, so The Home Theater Store subcontracted its electrician and plumber to put in the necessary high-voltage wiring and plumbing. A dedicated 20-amp circuit was installed for the theater, and AC outlets were strategically placed where the rack of audio/video components, subwoofers, ceiling-mounted video projector, and other electronic items would eventually go. A heating and cooling contractor was also called in to add an air handler and heat pump for the space and to run ductwork into the theater and throughout the basement.
Time spent: 1 week
Phase 4: Prewire
Low-voltage cabling, including speaker wire, HDMI cabling, component, video and cabling and Ethernet wiring, was routed through the studs. Based on the blueprints, The Home Theater Store knew exactly where to terminate each piece of wire.
Time spent: 3 days
Phase 5: Insulation and Soundproofing
When Rob framed in the space, he left several inches between the studs and the concrete walls. This left plenty of room to pack in soundproofing materials and insulation, which would reduce the amount of noise that could enter or escape the theater.
“It was fortunate that the mechanical room that housed the HVAC units were on the opposite side of the theater,” says Jamie. “The last thing I wanted my clients to hear during a quiet passage of ‘Titanic’ was the whooshing sound of the air kicking on.”
Time spent: 2 days
Phase 6: Drywall and Painting
After everything that belonged inside the walls was in place, Rob brought in his drywall team to hang, mud and sand the sheetrock. The walls were painted a warm taupe, and the ceiling was painted a flat dark brown.
Time spent: 2 weeks
Phase 7: Trim and Finish Work
Custom milled and stained crown molding, chair rails and baseboards were installed, as well as faceplates for the electrical outlets and smart dimmer switches for the lights. Final touches to the plumbing, electrical, and heating and cooling systems were made as well. Also during this phase, Rob collaborated with theater designer Mark Stoeckl to construct a facade for the screen, speakers and subwoofers; a stage for karaoke performances; columns for the side speakers; a bar for the back of the room; an in-wall equipment cabinet and a wrought iron spindle stairway.
“The trim stage is what really separates a basic, plain-vanilla sheetrock box with a projector and speakers from an elegant, truly magical home cinema,” says Jamie.
Time spent: 6 weeks
Phase 8: Flooring and Touchups
Carpet was laid in the theater, and tile was installed at the bar. Minor touchups to the walls were made.
Time spent: 1 week
Phase 9: Audio and Video Installation
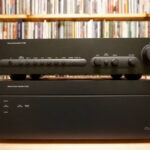
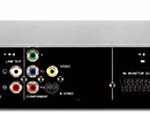
After all the dust had settled, The Home Theater Store installed the video projector to the ceiling, the screen and front speakers into the fascia, the dipole speakers to the side walls and the rear speakers into the ceiling. The rest of the audio and video components, including a Denon 5805 Mk2 processor, Denon 3930 CI DVD player, Control4 Media Controller (for whole-house music and control), Integra DTR 5.6 A/V receiver, cable boxes and Monster HTPS 7000 surge protector, were tucked inside a custom-built equipment rack underneath the stairwell.
Time spent: 3 days
Phase 10: Programming and Training
The handheld remote that would operate the audio/video equipment, as well as the room’s lights and whole-house music system, were programmed by The Home Theater Store’s lead programmer. All of the audio and video components were calibrated to ensure optimum visual and sonic clarity. Afterwards, Jamie showed the homeowners how to use the systems.
Time spent: 3 days
Equipment List
- Marantz VP12-S4 DLP video projector
- Atlantic Technology 8200 THX Ped subwoofers
- Atlantic Technology 8200 THX front left, right and center speakers
- Atlantic Technology 8200 THX dipole side speakers
- Atlantic Technology ESR20 rear in-ceiling speakers
- Denon AVR-5805 Mark II amplifier
- Denon DVD-3930 CI DVD player
- Integra DTR 5.6 A/V receiver
- Comcast cable HDTV set-top boxes
- Control4 Media Controller (whole-house music server)
- Control4 Mini-Touch in-wall keypads
- Control4 touchscreen-style remote
- Monster Power HTPS 7000 surge protector and line conditioner
- IXOS Gold and Kimber Cable wiring and interconnects